The F/A-18 Hornet family finally landed in War Thunder with the “Hornet’s Sting” update, and grinding these jets? It’s been a brutal slog mixed with some real highs. I’ve poured hours into the F/A-18A, F/A-18C Early, F/A-18C Late, and the fresh Super Hornet, pulling together loadouts, tactics, costs, and straight-up match stories across the BRs. Pin this for later – it’ll save you headaches.
What Makes Each Hornet Different?
Each one feels worlds apart, even if they share the family name and rough outline. It’s not just missile tweaks; these demand totally different ways to scrap.
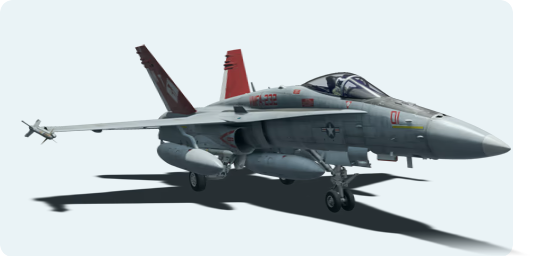
F/A-18A – The Entry-Level Fighter (BR 12.0-12.3)
She kicks off the lineup at the low end, and people rag on her way too much. Sure, the missiles suck – AIM-9L and AIM-7F/M Sparrows all day. Those 9Ls have zero IRCCM, so forget close scraps against anyone half-decent, and the Sparrows? They ditch lock like it’s nothing.
Nobody mentions this, though – the frame handles like a dream. Up at 12.3, half your foes can’t touch your agility, or they’re slugs that can’t match your turns. She holds speed solid through long pulls, and that M61A1 Vulcan? It carves planes apart once you’re lined up.
Key Stats:
- Engine: 2× General Electric F404-GE-400
- Max speed: 1,789 km/h at altitude
- Climb rate: 205 m/s (stock) / 253.5 m/s (spaded)
- Turn time: ~24 seconds
Biggest pain? She’s sluggish against the big dogs. Mach 2.1 looks fine on stats, but you’ll eat dust trying to bug out from real threats. Spotting matters huge – you can’t chase F-14s who just burner away clean.

F/A-18C Early – Premium Powerhouse (BR 12.7)
This premium slots right between the basic A and the endgame C Late. Drop 79.99€ and you snag the jet, 30 days premium, 3,000 Golden Eagles – mods all ready to roll.
Why shell out? AIM-7P Sparrows and AIM-9M Sidewinders. The 9Ms pack IRCCM at last, so you can actually mix it up close without flares ruining your day. Better Sparrows shrug off chaff more, even if they’re no magic bullet.
Bigger deal – the NCTR (Non-Cooperative Target Recognition) system IDs foes way out without leaning on IFF alone. In massive 16v16 brawls, it cuts down on blue-on-blue nonsense and gets you locks faster.
Ground attack ramps up too:
- GBU-12/16/10/24 Paveway II/III laser-guided bombs
- AGM-62A Walleye II ER/DL TV-guided bombs
- AGM-65E/F Mavericks
- AN/AAS-38A targeting pod
That 262% RP multiplier? It shreds the grind to the C Late. Stack it with talismans, and folks wrap the line in a weekend.
F/A-18C Late – Top-Tier King (BR 14.0)
Up here, the Hornet owns the field. Facing Typhoons, Rafales, Su-30s at 14.0 – stuff that should smoke you everywhere. But the C Late fights back with missile spam that tilts matches.
AIM-120B and AIM-120C-5 AMRAAMs flip the script. Load up to 10 AMRAAMs (8 + 2× AIM-9M works better in reality). Bs snap to speed quick inside 20 km. C-5s cut drag and stretch further, killer for BVR past 25 km.
My go-to setup:
- 6× AIM-120B (inner pylons)
- 2× AIM-120C-5 (outer pylons)
- 2× AIM-9M (wingtip rails)
- 1× 330-gallon drop tank (centerline)
Packs 8 active radar shots and IR backups, fuel for 30+ minutes burning hard. B vs C-5? Less about picking one – mix ’em for whatever range hits.
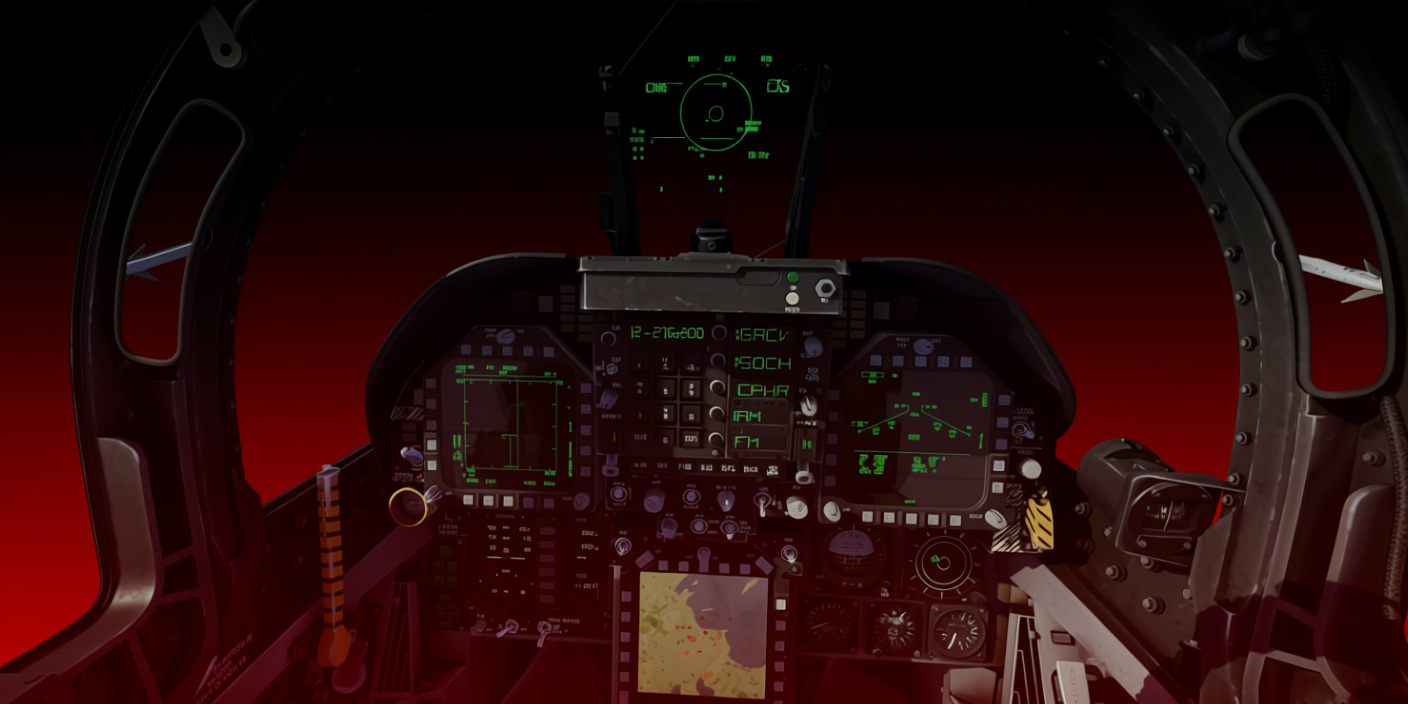
HMD (Helmet-Mounted Display) lets missiles chase your gaze – huge in turns when they think they’re clear of your nose. Pair with 9M IRCCM, and you nail shots that leave ’em scratching heads.
Fresh ground tools:
- JDAM GPS-guided bombs (GBU-38/32/31/64)
- LJDAM laser/GPS hybrid (GBU-54B, GBU-62 ER)
- APKWS II laser-guided rockets (14× AGR-20A/B per pod)
- LITENING II targeting pod (beats the old AN/AAS-38)
GPS drops wreck CAS – lob from 8,000+ meters, no laser babysitting, then jink away. Radar-mark, release, and it nails within 3 meters.
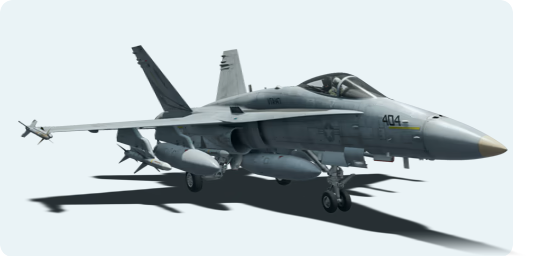
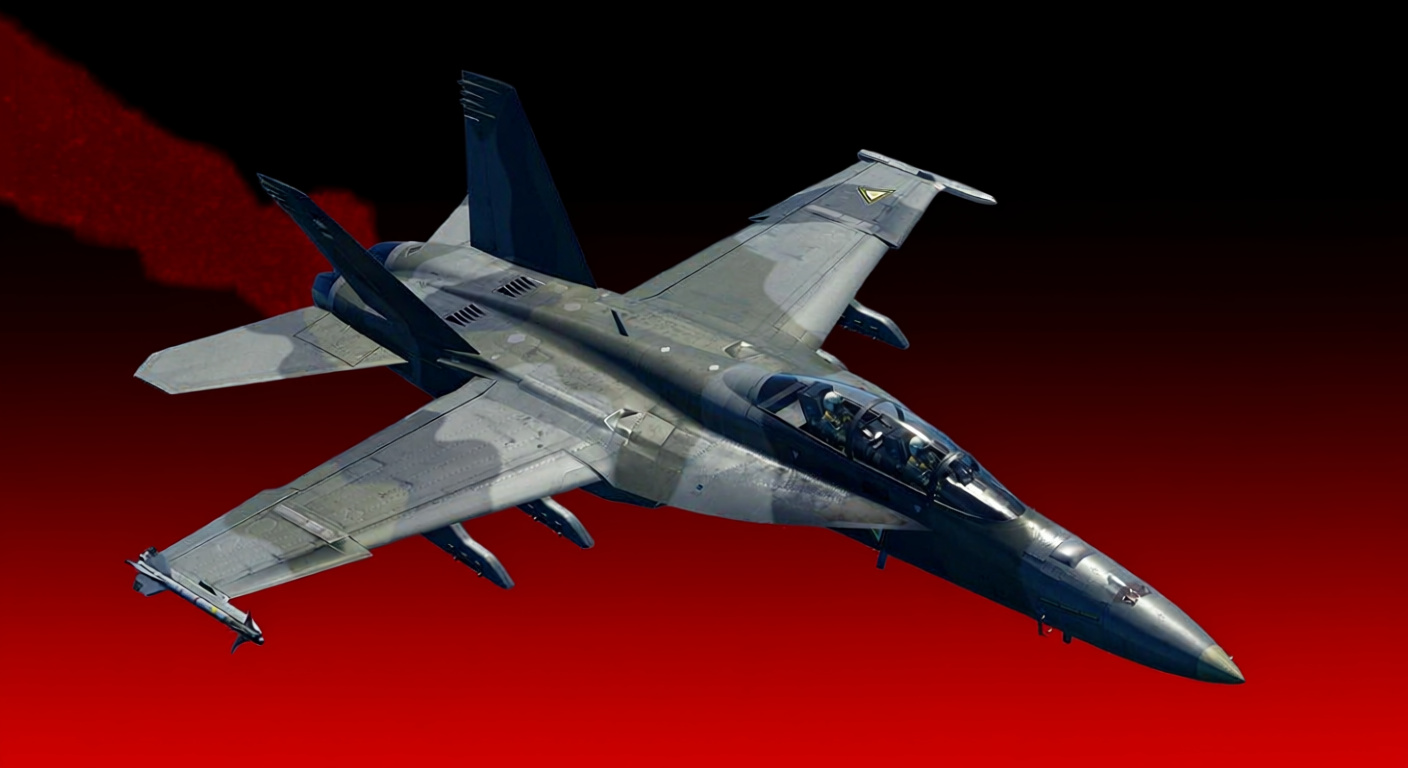
F/A-18E Super Hornet – The New Top Dog (BR 14.3)
Super Hornet? That’s a 90% airframe overhaul under the same old shell. Not some tweak – total rebuild.
What changed:
- New F414-GE-400 engines (9,470 kgf thrust each with afterburner)
- Increased wing area + composite materials = more lift + less weight
- 11 hardpoints (up from 9)
- AN/APG-79 AESA radar (Active Electronically Scanned Array)
- ATFLIR targeting pod with better thermal imaging
AESA radar? Total beast. No antenna wobble like old scans – it juggles multiples, flips air/ground on a dime, laughs off jams, spots stealthy stuff far out.
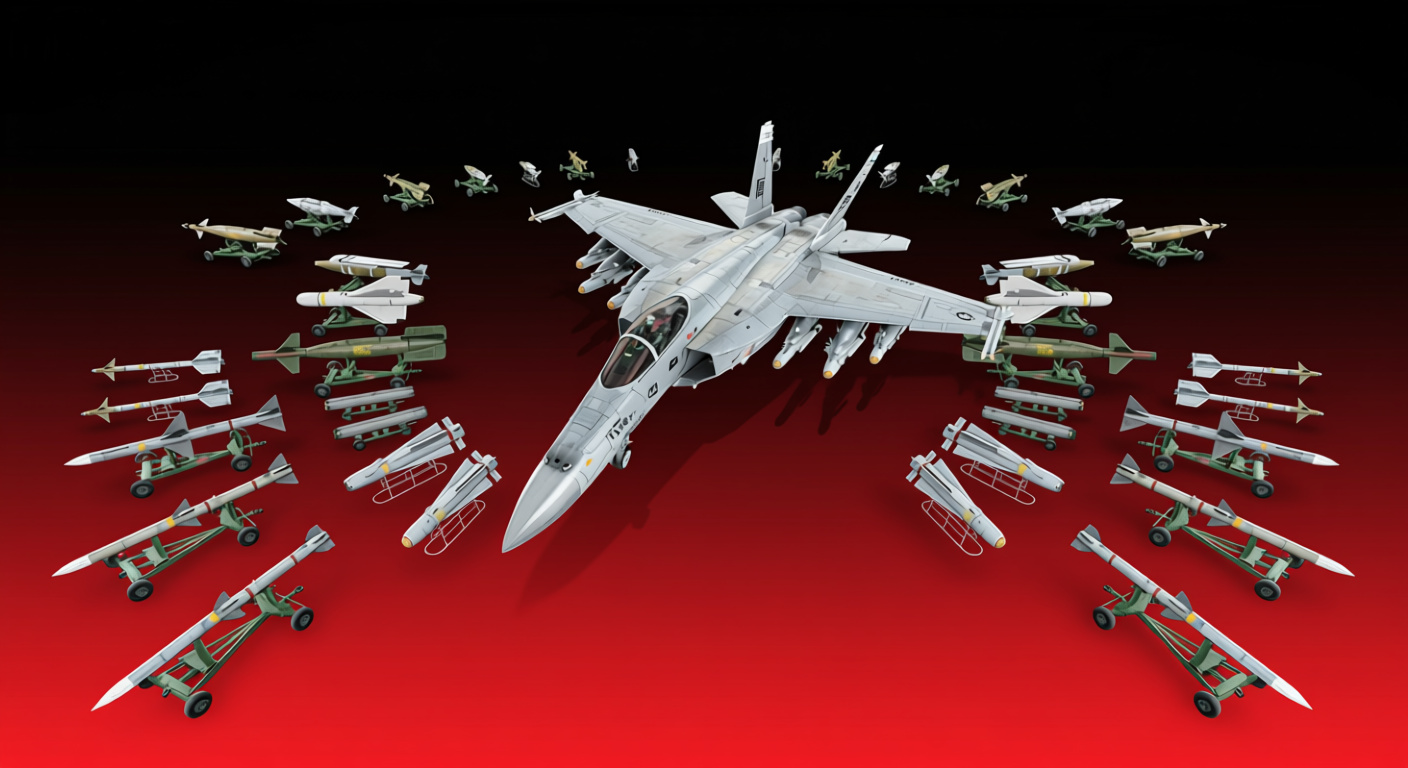
Max haul? 12× AIM-120s + 2× AIM-9M + tank. 14 missiles total. You won’t fire all before fuel runs dry or you eat dirt, but enemies bail when they see that arsenal.
Catch is – she’s the slowest at 14.3. Lags Typhoons, Rafales, Su-30s flat out. She pulls ahead in climb and accel to Mach 1.4, but speed chases? You’re toast.
Play it vertical – thrust-weight crushes there over raw velocity. Hit 8,000-9,000 meters (dodge contrails), hold energy, let AESA spot first and fire.
Common Characteristics Across All Hornets
All pack the same 20mm M61A1 Vulcan cannon – 578 rounds at 6,000 rounds/minute. That’s 5.8 seconds flat out, or 10-12 quick taps if you don’t spray.
Belt selection:
- Air Targets – HEF-I heavy belt, best for unarmored aircraft
- Armored Targets – SAPHEI only, slightly better penetration (37mm vs 40mm at point-blank)
- Stealth – no tracers, same damage as Default
- Default – mixed HEF-I/API-T/AP-I/SAPHEI
I stick to Stealth every time. No tracers means they can’t guess your angle, damage matches Default. Air Targets fans love the HEF-I purity, but it’s splitting hairs – both rip fighters in 15-20 rounds.
Flight limits stay fixed:
- Max speed (IAS): 1,477 km/h
- Mach limit: 2.1 M
- G-load: -5G / +11G (structural failure beyond these)
- Gear deployment: 700 km/h max
- Flaps: L/T at 463/935 km/h
That 11G ceiling? Pull savage without wings folding – but mind dives. Past 1,500 km/h IAS shreds you, even if gauges lie.
Every one has arrestor gear for carriers – key on Naval where the deck moves. Nail approaches; high AoA makes Hornet landings smoother than most, but speed control’s non-negotiable.
Combat Tactics – What Actually Works
BVR (Beyond Visual Range) – The META Playstyle
Top tier? BVR calls the shots. First shot from 30+ km usually seals it – if the missile doesn’t flop on dodges.
Standard BVR sequence:
- Climb immediately at match start – 15° angle, afterburner, heading 30° off-center from the furball. Don’t climb straight toward enemies; offset your path to avoid head-on jousts with faster opponents.
- Level off at 8,000-9,000 meters – below 10,000 meters to stay under contrail formation (contrails announce your position to everyone). If your team needs help lower, adjust accordingly, but altitude equals energy equals survival.
- Enable TWS (Track-While-Scan) mode – locks multiple targets without alerting their RWR (Radar Warning Receiver) until you go to STT (Single Target Track) for missile launch. The Super Hornet’s AESA excels here; older variants need more care with radar mode selection.
- Fire AMRAAMs at 20-25 km for B variants, 25-30 km for C-5s – launching downward (you’re higher than opponents) gives missiles extra energy. Aim for targets that are:
- Heading toward you (closure rate increases hit probability)
- Not notching (flying perpendicular to your radar – defeats Doppler)
- Not climbing aggressively (climbing targets can defeat pitbull missiles easier)
- Immediately crank 60-90° after launch – maintain radar lock initially, then break lock once the missile goes pitbull (active homing). This positions you defensively while keeping missile energy high.
Defensive notching: When someone launches at you, turn perpendicular to their radar beam. Your closure rate drops to zero, and Doppler radar loses lock. Combine with chaff (pop 4-6 bursts while notching) and altitude changes. The Hornet bleeds energy in hard notches, so only commit when necessary – unlike the F-15 which can sustain these maneuvers indefinitely.
Dogfighting – Low-Speed Superiority
BVR busts, and you’re in the merge? Hornet turns nasty. Drop to low speed (500-700 km/h) – big surfaces and AoA let you dominate.
Nose pulls 30-40° over the vector – point at ’em while flying elsewhere. Old-school pilots get baited right into your sights.
Dogfight tactics:
Two-circle fight (vertical): Leverage climb. Yo-yo up on overshoot, slow at peak, roll down, dive their line. She stays crisp below 400 km/h where others mush out.
One-circle fight (horizontal): Steer clear vs Typhoons or Rafales – they out-turn sustained. Against bricks like Su-30s or F-15s, win rates at 500-600 km/h corners. Slower? Radius shrinks; faster? Can’t tighten.
Vertical displacement: Tail on you? Skip flat – go up. Burner full, yank vertical, flip at 200 km/h. Thrust-weight hangs you there, nose down while they flail. Snap a 9M mid-weirdness.
Gun kills: M61A1 needs deflection shooting – aim where the opponent will be, not where they are. At convergence (600 meters default), your rounds focus into a tight cone. Burst 0.3-0.5 seconds, observe, correct, burst again. Going full auto wastes ammo and creates dispersion.
Ground Attack – CAS Done Right
Hornets crush mixed battles – spawn separate from F-15E, so you hop in cheap even after Eagles burn SP.
Anti-tank loadout (C Late/Super Hornet):
- 4× AGM-65E Mavericks (laser-guided, longer standoff)
- 2× GBU-12 Paveway II (backup precision)
- 2× AIM-120 (self-defense)
- 2× AIM-9M (emergency IR)
- LITENING II or ATFLIR pod
Mavericks from 8-10 km slant. TV/IR seekers fire-forget on still stuff, laser for movers. Hang above 4,000 meters – dodges most SPAA radars.
Base bombing (all variants):
- 4× GBU-31 JDAM (2,000 lb GPS bombs)
- Drop tank
- 2× AIM-120 minimum
Climb 7,000+ meters, side-angle bases, radar-mark each, ripple JDAMs. One GBU-31 eats ~20% of a base; four clear one or split ’em. GPS means no loiter risk – mark, drop, bolt.
SPAA hunting (Super Hornet):
- 14× APKWS II rockets (laser-guided 70mm)
- ATFLIR pod
- Full air-to-air loadout otherwise
APKWS smartens rockets. Pods hold 14; ripple 2-3. Hits 3-6 km. Nails Tunguskas and Pantsirs thinking they’re hidden.
Current Bugs & Issues (As of Early 2026)
War Thunder players keep calling out game-breaking bugs on the new Hornets, Super especially:
Radar TWS Drift Bug
Worst one – enemy missiles fire, and TWS shows targets drifting insane (2,000+ m/s side to side). Turns BVR into a crapshoot on Super Hornet – locks go haywire.
Workaround: Flip to STT sooner. Warns their RWR but holds track. Or ping teammates for IFF to confirm before shooting.
AMRAAM Proximity Fuse Failures
AMRAAMs zip right by lethal range and fizzle. Fuse glitches random, bad on twisters or weird angles.
Workaround: None solid. Double-tap big threats. Wasteful, but beats a dud whiffing.
TWS Lock Loss in Multipath
Under 60 meters should hide from radars. Now TWS drops locks in multipath way higher, Super Hornet worst.
Workaround: Treat anything under 100 meters as radar-blind. Lean on IRST if up, or eyeball it.
Gaijin knows, no fix date yet. Patches coming – Super needs work to unleash it.
Economy & Progression
Research Costs
| Variant | RP Cost | SL Purchase | Modifications RP | Modifications SL |
|---|---|---|---|---|
| F/A-18A | 400,000 | 1,080,000 | 305,000 | 469,000 |
| F/A-18C Late | 420,000 | 1,120,000 | 317,400 | 483,000 |
| F/A-18C Early (premium) | N/A | €79.99 | 0 (all unlocked) | 0 |
C Early premium? Pays back fast on tech tree grinds. 262% RP plus included premium account? Both tree Hornets in 25-30 hours vs 80+ solo.
Repair Costs (Spaded)
| Variant | AB | RB | SB |
|---|---|---|---|
| F/A-18A | 4,393 | 12,692 | 14,969 |
| F/A-18C Late | 4,467 | 12,850 | 15,144 |
| Super Hornet | ~5,000 | ~14,000 | ~16,500 |
Fair shakes for top jets. Beats F-14B’s 18,000+ RB or Soviet 20k+ monsters. One or two kills covers RB; three-four in AB.
Talisman costs:
- F/A-18A: 3,100 GE
- F/A-18C Late: 3,300 GE
Own C Early? Skip talismans on tree ones – premium carries the load. Hoard GE.
Best Squadmates & Team Composition
Hornet pairs best with quick interceptors rushing while you sling missiles:
Ideal teammates:
- F-15C/E – speed grabs map control as you climb
- Eurofighter Typhoon – same gig; sync AMRAAM barrages
- Rafale – NATO vibes mean good team play
- Su-30 – mixed battles, Russians need your backup
Avoid teaming with:
- Multiple other Hornets – group speed tanks; fast enemies lap you
- Strike aircraft (A-10, Su-25) – escorts pull you from BVR
- Uncoordinated attackers – team low-dive leaves you solo high
Chat wins. Radio hits:
- “Cover me!” when tailed
- “Attack the D point!” on key marks
- “Returning to base” to flag low ammo
Should You Grind the Hornets?

Hell yes – but know your style.
Love BVR and radar tricks? Hornets deliver top-shelf fights. A to Super teaches energy, radar, missile paths like nothing else.
Dogfights or burner kings? It’ll grind your gears. Not F-16 agile or F-15 fast. She’s a multirole do-everything that kills when you hit her groove – that missile wall.
Premium path: Grab C Early pack with €80 spare and tight schedule. Grind boost’s insane.
Free-to-play path: Hit A first, feel the frame, then C Late. Hold off Super till C Late clicks – bugs punish rookies.
Ground RB players: Hornet’s essential for US top lineups. No other Yank packs this precision punch cheap.
My Personal Take After 200+ Hours
Logged heavy time in each – Super ate my weeks straight. Straight talk:
- F/A-18A (7/10): Slept-on at 12.3. Missiles drag, but frame’s gold. Solid starter.
- F/A-18C Early (9/10): Top premium fighter period. Mod skips and RP flood? Must if top-tier serious.
- F/A-18C Late (9.5/10): Hornet sweet spot. Ten AMRAAMs plus HMD? Backline gunner vibe, missiles everywhere while squad merges. Hits perfect.
- F/A-18E Super Hornet (8/10 currently, 10/10 when bugs fixed): Ought to rule 14.3. AESA, 12-missile brick, beefier power – edges C Late hard. Bugs like TWS drift gut it now. Gaijin patches? Best bird in game.
Bottom line: Hornets show Gaijin’s top modeling. Models fly real, weapons match doctrine, variants mix it up. Grind ’em, nail BVR, rule 12.0-14.3.
Everything you need is right here – loadouts, tactics, economy, and bugs. Save this page, come back when you unlock each variant, and adjust your playstyle as you climb the ranks. See you in the skies, and remember – speed is life, altitude is life insurance, and missiles solve most problems.