Mualani shreds enemies when you nail her setup – I’ve grinded through countless team setups and artifact farms with her, and she’s quickly turned into my go-to Natlan powerhouse. This Hydro catalyst wielder packs explosive burst damage alongside some wildly entertaining mobility tricks. Sure, she demands sharper timing than Neuvillette’s straightforward blasts, but nailing those huge Vaporize crits? Pure satisfaction.
Let’s break down how to turn Mualani into a relentless shredder.
Understanding Mualani’s Kit (The Fun Stuff)


What sets this shark-surfing beast apart:


Elemental Skill – Surfshark Wavebreaker flips Mualani into a wave-riding machine. Tap it, and you hop on Sharky, kicking off Nightsoul’s Blessing with 60 Nightsoul points. Speed surges ahead; you shrug off interrupts like nothing; bodies of water turn into your personal racetrack.

The killer feature kicks in with Wave Momentum stacks. Bump into foes while riding (0.7s cooldown per enemy), and you snag a stack – up to three total. They amp your upcoming Normal Attack into Sharky’s Bite, Hydro damage tied straight to Max HP.
Hit three stacks? That attack evolves into Sharky’s Surging Bite – burns through the stacks for brutal output and unleashes up to five homing Shark Missiles on nearby marked targets.
Hard-earned tip: Missiles drop to 72% power against three-plus foes at once. She dominates one-on-one fights; mob packs won’t melt as fast as with dedicated AoE monsters.
Elemental Burst – Boomsharka-laka hurls a massive homing shark bomb that detonates for huge AoE Hydro hits off Max HP. Tracking glitches out occasionally (I’ve seen it ignore dummies), but solid connections deliver devastation.

Her Ascension 1 passive drops Puffers after a Surging Bite lands – scooping them nets 20 Nightsoul points apiece (two max per skill cycle). That stretches your ride from six seconds toward ten if you snag both without fumbling.

Ascension 4 passive ties into squad play – nearby allies popping Nightsoul Bursts build Wavechaser’s Exploits stacks (three cap). Bursting clears them to pump Boomsharka-laka by 15%/30%/45% Max HP based on how many you banked.

Core Stats & Goals
From rolling artifacts nonstop, these targets deliver:
- Max HP: At least 30,000 (35,000-40,000 hits way harder)
- CRIT Rate: 40-50% pre-Obsidian Codex; cap at 55% with the buff (overkill wastes everything)
- CRIT DMG: 180% floor; 200%+ actually pops off
- Elemental Mastery: 200+ to juice Vaporize
CRIT Rate heads-up: Obsidian Codex dumps 40%. Her level 90 ascension? 24.2% CRIT Rate. Sacrificial Jade tacks on 36.8%. Stack wrong, and you’re at 100%+ – substats down the drain. I’ve botched it; skip that trap.
Substat chase (my endless grind):
- CRIT DMG leads
- CRIT Rate follows (stop at ~55% total)
- HP% next
- Elemental Mastery trails
Energy Recharge? Skip it. Burst adds spice, but cramming it every cycle guts your offense and slows clears.
Best Artifacts for Mualani
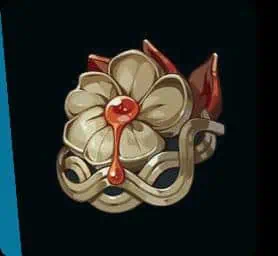
4-piece Obsidian Codex owns her slot, hands down:

- 2-piece: +15% damage in Nightsoul’s Blessing on-field
- 4-piece: +40% CRIT Rate for 6s post-Nightsoul point spend (every second trigger)
That CRIT Rate surge turns her surfing sessions into crit machines – she burns points nonstop, so the buff sticks around her full combo.
Main stat picks:
- Sands: HP% or Elemental Mastery (HP% edges out usually; EM shines in Vaporize spam)
- Goblet: Hydro DMG Bonus (HP% if CRIT Rate’s bloated)
- Circlet: CRIT DMG top pick; CRIT Rate okay; HP% when stats overflow
Fallback sets without Obsidian Codex:
4-piece Heart of Depth delivers reliable Hydro amps and Normal Attack spikes, since Sharky’s Bite registers as Normal damage.

4-piece Marechaussee Hunter clicks only in Furina squads – the HP swings pair up perfectly, but lock your team around it.
2-piece mixes with HP%, Hydro DMG%, or CRIT pieces hold strong as stopgaps. I stuck with 2pc Nymph’s Dream + 2pc Tenacity for ages pre-Obsidian; Abyss stayed conquered.

Weapon Selection Guide
Surf’s Up (Signature) – Best-in-Slot
- Base ATK: 542 | CRIT DMG: 88.2%
- Passive: +20% Max HP; post-Skill, build 4 Scorching Summer stacks (12% Normal Attack damage each)
Tailor-made for her. CRIT DMG sub + HP lift + Normal Attack scaling locks in her flow.
Top 5-Star Alternatives:
Tome of the Eternal Flow feeds HP% and holds up, even if not custom-fit.

A Thousand Floating Dreams acts as an EM booster for Vaporize chasers.

Best 4-Star Options:
Ring of Yaxche (Craftable) – My F2P go-to
- Base ATK: 510 | HP%: 41.3%
- Passive: Skill triggers Jade-Forged Crown; 1,000 Max HP = 0.6% Normal Attack damage (16% cap over 10s)
Refine it easy since it’s craftable. HP focus and Normal Attack uplift match her vibe spot-on.
The Widsith – Luck-based powerhouse
- CRIT DMG substat
- Swap-in randoms (ATK%, Elemental DMG%, or EM)

Elemental DMG proc rivals 5-stars. ATK% lands? Underwhelms, given her HP scaling.
Sacrificial Jade – CRIT Rate heavy
- Base ATK: 454 | CRIT Rate: 36.8%
- Passive: +32% Max HP and +40 EM after 5s off-field

Solid numbers, but pairs with Obsidian Codex to flood CRIT Rate. Grab only if artifacts starve on it.
Prototype Amber serves as desperation fuel, but craft Ring of Yaxche over it any day.
Team Compositions That Actually Work
Mualani dominates Forward Vaporize squads – Pyro setup first, her Hydro follows to ignite reactions. Slow hits but enormous payloads suit this setup dead-on.
Premium Team – Mualani/Mavuika/Xilonen/Sucrose

This lineup crushes all comers:
- Mavuika: Off-field Pyro spread + huge damage lift
- Xilonen: Stretched RES shred (top partner for her, no debate)
- Sucrose: EM pass + Viridescent Venerer shred + enemy clumping
Rotations glide; output matches current meta beasts.
Classic Vaporize – Mualani/Xiangling/Kazuha/Zhongli

![]()
Proven workhorse that still delivers:
- Xiangling: Steadiest off-field Pyro
- Kazuha: Pyro swirl buffs + grouping
- Zhongli: Shield + broad RES shred + safety net
Tougher than Mavuika’s; peaks lower but forgives errors.
Burning-Vaporize – Mualani/Pyro Traveler/Emilie/Zhongli
Timing-heavy but engaging twist:
- Pyro Traveler: Burning starter
- Emilie: Dendro applicator
- Zhongli: Shield + RES shred
Burn first (Dendro + Pyro), then Vaporize without dousing flames. Finicky, but clicks hard when it lands.
Budget Friendly – Mualani/Xiangling/Yelan/Lan Yan
Easy-access crew with 4-stars heavy:
- Xiangling: Pyro source
- Yelan: Hydro resonance (+25% Max HP) + off-field hits
- Lan Yan: Utility + heals
Resonance pumps her HP-scaled damage big-time. Yelan’s bursts layer on solid extras.
Team-building rules I stick to:
Lock a solid off-field Pyro (Xiangling/Mavuika first) → Anemo for clumping/buffs (Kazuha/Sucrose) → Shield/heal or extra Hydro for resonance → Adjust for your pulls
Dodge Cryo unless Freeze (Citlali breaks rules – Hydro DMG Bonus + shred, but Cryo can mess Pyro flow).
Constellation Breakdown
- C0: Runs smooth; competes in tuned squads
- C1 – The Leisurely "Meztli":


- Opening Sharky’s Surging Bite + missiles +66% Max HP damage
- -30% Phlogiston/Nightsoul drain out of combat
- C2 – Mualani, Going All Out!:

- 2 Wave Momentum stacks on entry
- +1 stack per Puffer
- +12 Nightsoul points for 2 Puffers
- C3: +3 Elemental Skill levels (pure output bump)
- C4 – Sharky Eats Puffies:

- 8 Energy per Puffer
- +75% Burst damage
- C5: +3 Elemental Burst levels
- C6 – Spirit of the Springs’ People:
- C1 bonus hits every Surging Bite, not just first


Constellation take: C0 solid; C1 value king; C2 eases everything; C4-C6 for speed demons.
Playstyle Tips & Rotation Patterns
Core loop I run every time:
- Supports drop buffs/debuffs
- Surfshark Wavebreaker (skill on)
- Ride through foes for 3 Wave Momentum
- Normal for Surging Bite
- Loop 3-4 (usually 3 maxed bites)
- Grab Puffers for extra time
- Boomsharka-laka if ready
- Back to supports
Pitfalls I tripped over early:
- ❌ Normal before 3 stacks – tanks damage
- ❌ Skipping Puffers – shortens combos dumbly
- ❌ ER stacking – nerfs offense for meh Burst
- ❌ CRIT Rate bloat – substats vanish past 100%
- ❌ Surf whiffs – practice aiming
Tricks that sped up my runs:
- ✓ Dash between bumps for quicker stacks
- ✓ Line up behind packs for multi-hits per pass
- ✓ Burst after buffs fade (snapshots rule)
- ✓ Jump strikes when time’s tight
- ✓ Hydro pre-buff if Anemo wants it swirled
Surfing starts clunky – misses, lost stacks, bad timing. Run it 20-30 times; it sinks in.
Talent Priority & Materials
Leveling: Elemental Skill → Elemental Burst → Normal Attack
![]()
![]()
Normal talent hardly moves the needle – Sharky’s Bite pulls from Skill multipliers. Past 6, it’s dead weight; pump Skill hard, Burst next.
Full ascension haul:
- Varunada Lazurite (Hydro gems via Oceanid/Rhodeia)

- Mark of the Binding Blessing ×46 (weekly from All-Devouring Narwhal)
- Sprayfeather Gill ×168 (Natlan local)
- Sentry’s Wooden Whistle/Warrior’s Metal Whistle/Saurian-Crowned Warrior’s Golden Whistle (Sauroform Tribal Warrior loot)
- 420,000 Mora


Talent books: Contention (Mon/Thu/Sun domains)

- 6 Lightless Mass (All-Devouring Narwhal weekly)
- Crown of Insight ×1 per crown
Crown Skill if she’s your jam; Burst for mains only; Normal? Never.
Freeze Team Potential (Alternative Playstyle)
Escoffier’s drop opened Freeze doors for Mualani – main DPS or sub:
Mualani/Escoffier/Furina/Citlali freezes reliably, Mualani Hydro-fueling while Escoffier leads damage. Her HP-based off-hits contribute without hogging field.

Vaporize outdamages it, but Freeze handles Pyro-proof foes or weak Pyro benches.
Final Thoughts – Should You Pull Mualani?

Pull if
- Unique mechanics with skill ceiling excite you
- Solid off-field Pyro sits ready (Xiangling/Mavuika)
- Overworld surfing hooks you
- Hydro DPS beyond Neuvillette appeals
Skip if
- Easy-mode play’s your thing
- Pyro supports lag behind
- Neuvillette already owns Hydro
- Precise aiming frustrates
Mualani’s meta when mastered but lags Neuvillette on simplicity. She pays back effort; slop gets punished.
She’s my pick – the ride stays fresh, Vaporize pops thrill, water traversal owns. Obsidian grind tested me, but 200k+ crit Bites justify it all.
Bookmark for the essentials – from stats to rotations to squads. Current banner or rerun, this maximizes her shred.