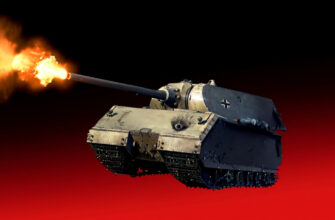
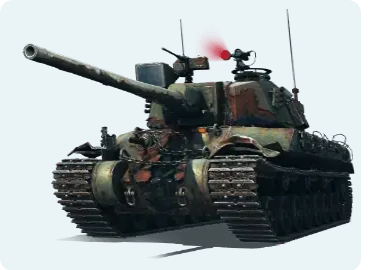
Straight up, the Stitch won’t floor you. I’ve clocked serious hours in this Japanese tier VIII heavy, and it lands somewhere between solid enough and total drag, all on how you handle it.
What Even Is the Stitch Tank?
The Stitch (Chi-Se before Wargaming slapped on the event flair) drops from the Babylon: Forbidden Zone grind. Usual routine – smash all difficulty levels across phases, crack every tape, and snag your free tier VIII Japanese premium heavy. Kicking off June 2026, folks could slog through the event mode for this ride. And yeah? That’s the real win – zero gold out of pocket. The backstory’s classic Wargaming weirdness: shredded timelines, ripped-off collectors, leaping to uncharted Magnus spots, crowds in gas masks chanting nonsense with chains and hooks. Black ooze leaking all over. Spooky vibe for the event, but it fades fast when you’re angling in a scrap.

Core Stats: The Good, The Bad, and The Mediocre
Numbers cut through the noise when rounds are zipping.
Firepower Department
That 105mm Type 5 Se gun? It’s alright. Plain alright.
- Alpha damage: 330/330/430 HP (standard/gold/HE)
- Penetration: 220mm standard, 255mm gold AP
- DPM: roughly 2,200 HP/min
- Rate of fire: 6.67 rounds per minute
- Reload time: 9 seconds
- Aim time: 2.20 seconds
- Accuracy: 0.37 at 100m
The kicker (and it’s a pain): gold pen caps at 255mm. For tier VIII heavies, that’s weak sauce. You’ll ricochet off slanted heavies and supers more than you care to.
DPM’s nothing flashy – 2,200 per minute keeps you average at best. No trading blows unless they’re hurting already.
But – key point – the gun depression rocks hard. -13 degrees down (20 up). That’s the Stitch’s sweet spot. Hull-down turns into your go-to move, your hideout, what keeps it playable.
Mobility: Heavy-Medium Hybrid Energy
Ditch the old-school heavy mindset. This thing’s got “heavy medium” written all over it, but it’s sluggish even for that.
- Engine power: 940 hp
- Power-to-weight: 17.10 hp/ton (up from the stock 15.5)
- Top speed: 40 km/h (45 with turbocharger)
- Reverse speed: decent enough for backing off ridges
- Hull traverse: 36 deg/s
- Turret traverse: 35 deg/s
17 hp/ton moves alright on flats. No medium-style flanks, but you can shift spots without dragging forever. FCM 50 t feel – present, not pokey, not plodding.
Soft terrain resistance sucks, though. Mud, dirt, bumps? That 54.98-ton frame bogs you down bad. Hug roads and firm lines where you can.
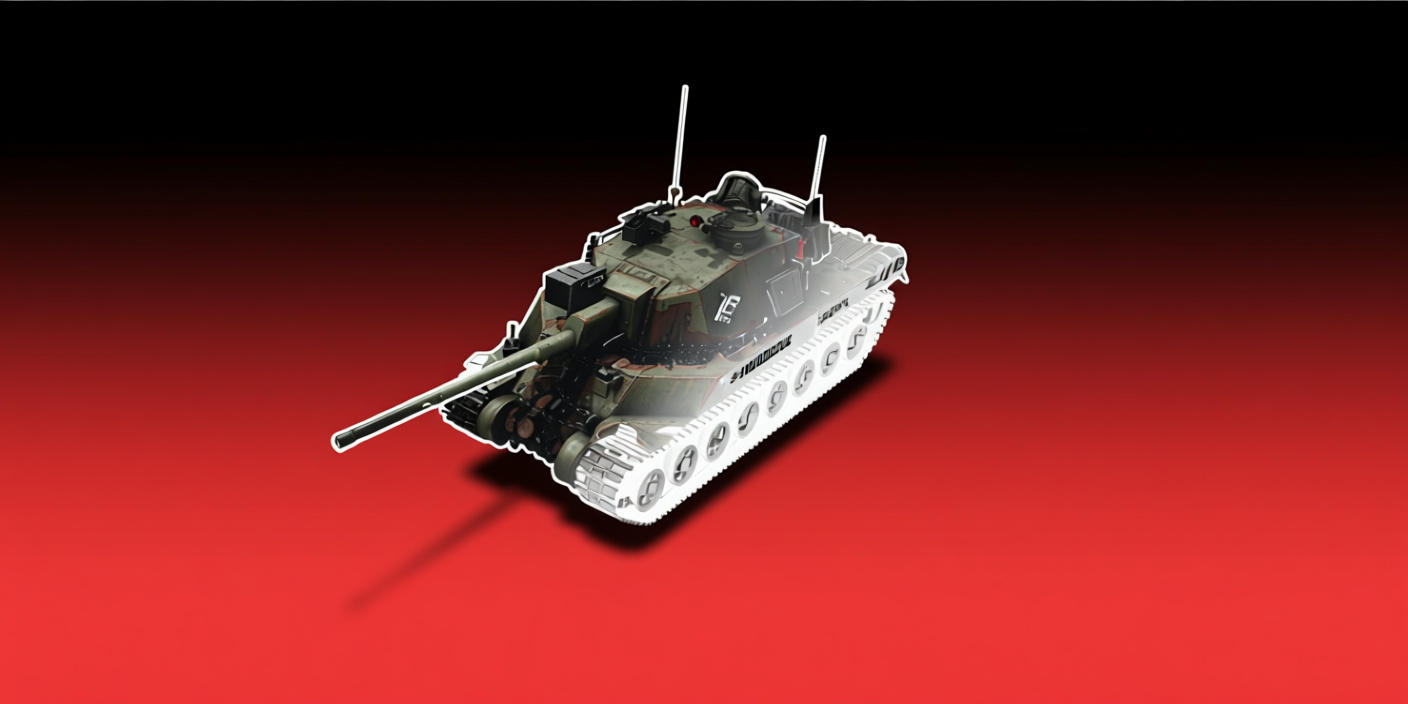
Armor: Paper Tiger Syndrome
Here’s where it crumbles.
Hull armor:
- Front: 135mm (upper plate 180-200mm effective angled)
- Lower plate: 160mm effective
- Sides: 80mm
- Rear: 60mm
Turret armor:
- Front: 210mm nominal
- Cheeks: 215-220mm
- Mantlet: 215mm
- Sides: 100mm
- Rear: 70mm
Looks passable on spec sheet. Reality? Same-tier guns punch through easy. Hull’s a straight box – no bounce angles, no fancy spacing like the Type 4 Heavy.
The cupola’s huge and sticks out. Hull-down or not, sharp shots hit it every time. Cheeks hold up some, but 255mm golds (tier VIII staple) carve right in.
Sidescraping? Forget it. You’re just a penetrable brick.
Vision and Concealment: Thoroughly Average
- View range: 390m
- Signal range: 570m
- Camo rating: nothing to write home about
Spotting’s workable but boring. No passive vision tricks, and pushing scout-style gets you wrecked. Hang with the group, ridge-peek with depression, let meds handle eyes.
How to Actually Play This Thing (Without Losing Your Mind)

Dozens of matches in, this is what clicks:
Play Like a Support Heavy, Not a Brawler
No sidescraping. No charge-ins. You’re hull-down pest from cover.
Spot a ridge or hump for height edge. Drop that killer -13 degree depression, tag for 330, duck before payback. Armor fails in drags, but angles save your hide.
Positioning Is Everything
Second line behind real heavies or med packs. Not soaking hits – dishing from safer spots while others eat the heat.
City fights? Hug corners with solid walls. Wide opens? Rush ridgelines. Flat nothing? Rough day ahead, no lie.
Leverage High Ground Constantly
Elevation’s your edge. Depression lets you fire where foes can’t reply right. Less exposure, fewer weak hits, thicker effective plating.
Tiny road rise? Gold with 13 degrees.
- Find a hull-down spot early and hold it.
- Avoid open-field brawls; trade only when you have angle advantage.
- Conserve gold for tough targets; use standard shells on meds/lights.
Ammunition Economy
Standard shells hit about 600 credits a pop. Golds? 4,800 credits each. Truth hurts: gold’s must against tier IXs and Xs. 220mm standard skips off angles and supers. But all-gold tanks your earnings.
One scrap with some golds? 31,000 profit. Mostly standards? 85,000 credits. Gap’s huge for F2P credit farms. Load 20-25 golds, pick shots on hard nuts, standard-spam meds and lights.
Equipment Setup: What Actually Works
Endless debates, but this fits the ride’s quirks:
Standard Configuration (My Recommendation)
Rammer + Improved Ventilation + Experimental Turbocharger
- Rammer: gotta have it. 9-second reload drags without.
- Vents: tweaks the so-so aim and accuracy a touch
- Turbo: hits 45 km/h, aids shifts
Balances punch, speed, handling. No stars, but no total flops.
Alternative: The “Budget” Setup
Rammer + Grousers + Vents
Terrain bogging you (it will on mush)? Grousers fix off-road crawl big time. Trade peak speed for better mud turns and hull spin.
Why Not Improved Aiming?
Handling’s meh, yeah – but 2.20-second aim ain’t dire for gear slots. Boost speed or reload instead.
Crew Skills: Don’t Overcomplicate It
Heavy crew basics fit here:
Commander:
- Sixth Sense (obviously)
- Brothers in Arms
- Repairs
- Recon
Gunner:
- Repairs
- Brothers in Arms
- Snap Shot
- Deadeye (for cupola sniping nonstop)
Driver:
- Repairs
- Brothers in Arms
- Smooth Ride
- Off-Road Driving (terrain drag demands it)
Radio Operator:
- Repairs
- Brothers in Arms
- Situational Awareness
- Safe Stowage
Loader:
- Repairs
- Brothers in Arms
- Adrenaline Rush
- Intuition (for ammo swaps)
Repairs + Brothers in Arms core. Constant pens mean module hits, faster tracks mean survival.
Team Composition: Where Stitch Fits
No carry machine. Own that.
Shines in medium-heavy mixes for backup fire, not front damage eat. Team with supers like VK 100.01 P or Defender to tank while you poke hull-down.
Medium squads? You’re the hold – slower, bigger bite than most meds. Use 1,550 HP for pullbacks or flank guards.
Skip brawl crews. No plating or DPM for head-on heavies.
Community Reception: The Honest Truth
Players split hard. Ratings scrape 4/10 tops – stings.
Some dig it as “decent mid-grind tool” with fair alpha and hull-down turret hold. Others trash it as “lame Mirny drop” next to Obsidian or Nergal.
Gripes nail it:
- “Paper for a heavy”
- “Gun feels off”
- “Average everywhere but depression”
Spot on. But flip: free premium? It’ll do. No gold sink. No box gamble. Event grind couple weeks, tier VIII credits in pocket.
Folks hit the mark with 1,700 bonus points from missions, just 300 real play needed. Time sink? Manageable.
Maps Where Stitch Excels (And Where It Suffers)
Good maps:
- Mines – hill grabs suit you
- Himmelsdorf – corners and ups/downs galore
- Abbey – ridge heaven
- Cliff – duh
Bad maps:
- Prokhorovka – flat killer
- Malinovka – wide open, zero hide
- Empire’s Border – med/light joy, heavy nightmare
Okay maps:
- Ensk – tight urban, spot over plate
- Ruinberg – peek cover everywhere
Final Verdict: Should You Grind for It?
After real grind time, my call:
- F2P needing tier VIII credit mules – snag it, no doubt. Event’s straightforward, effort fair, any tier VIII beats zilch.
- Got strong tier VIII premiums like Progetto 46, Bourrasque, or Defender? Won’t swap in. Side option tops, step down usually.
- Collectors and grinders – yeah, event exclusive with style.
- Competitive folks – pass. Plate too iffy, handling too flat, speed too capped for ranked or clans.
Stitch’s that odd spot: not awful, not killer, just exists. Like a plain ride – gets you there, blends in, handy sometimes, dull always.
Personal rating: 4/10 – depression and free tag carry it. Tech tree or gold buy? 3/10 flat.
Tips for Maximizing Performance
Grinding it anyway (free’s free), quick hits:
Positioning mindset: Hull-down sniper style – claim spot, rack hits, shift pre-focus
Engagement distance: Mid (200-300m) – accurate enough, bail fast
Target priority: Soft spots and meds where pen holds
Avoid: Tier X scraps where plate vanishes and pen whiffs
Credit grinding: Standard 70-80% to bank real silver
Map awareness: Sluggish – flank folds, no getaway
No miracles. Mediocre with competence sparks. For 2026 free tier VIII? That’s the bar these days.
I’ve pulled all the essentials here – bookmark it, builds and plays all bundled. Skip the source chase; full rundown’s right there.